23 Structures During Pandemic by Verryl V Fosnight Jr
Verryl V Fosnight Jr's Gallery Verryl V Fosnight Jr's Gallery
×
  1. Verryl V Fosnight Jr's Gallery
  2. Wyoming Division HO Operation LayoutWyoming Division HO Operation Layout
  3. 23 Structures During Pandemic23 Structures During Pandemic
03 Phase III Construction
04 Phase IV All Track Done--Details
05 Structures
06 Wyoming Division Operation Sessions
07 Fall Invitational Nov 12-14, 2016
08 First Annual Winter Invitational
09 Backdrops Signals Scenery
10 Backdrops Signals Scenery
11 2017 Winter Invitational Meet BBQ
12 2017 Winter Invitational Meet Ops
13 Winter Invitational 2017 Lenander Photos
14 2018 Fourth Winter Invitational
16 Spring Invitational (5th) Ops Meet
17 Photographing the WyoDivOps 12/14/19
18 Ops 121419
19 Photos "Lightweight Ops Article"
20 Scenery and Structures June 2020
21 Wyoming Division Scenery
22 ABS Signals
23 Structures During Pandemic
24 Post Pandemic August 2022
25 How We Operate-Fall 2022
Leaving Cheyenne westbound past Tower A, the interlocking tower where originally turnouts were controlled with manually activated levels. This was a brass model that Lenny painted and detailed inside including lights. The two storage shacks nearby are seen on p. 106 of Robert Darwin's classic book"The History of the Union Pacific Railroad in Cheyenne." Lenny drew them n AutoCAD and 3D printed them out. I put up the turnout number posts to identify the 66 turnouts with Tortoise machines electrical switches on the panels along the south side (geographically speaking) of the Cheyenne steam yard bench. The Tortoises were necessary for all the turnouts which were too far inboard to reach on that 84 inch wide bench. See next photo.
Our model of the Cheyenne yard has all the tracks except 2 storage tracks and 3 freight house tracks! The 18x24" hanging map has all 69 of the Tortoise turnouts numbered left to right on the map, and these correlate with the numbered electrical rocker switches set inside 1" holes on the 12 panels across the bench fascia. After an engineer determines his route in or out of the yard, he can set the turnouts accordingly. The turnouts on the bench are labeled with 3/16" square Plastrut poles about 1 1/4"... 
View More
tall. This photo was taken early in the installation, so only a few of the white numbered poles can be seen to the left. These layout posts can be seen better on the previous photo, which was taken after all the posts were installed. The description of the turnout numbering is continued on next photo.
Here is a closeup of one of the 12 Cheyenne steam yard panels. This photo was taken with the DCC track power on, so the LEDs are on to mark the direction each turnout is set. This photo was taken before the electrical switches and turnouts on the map were numbered; it is shown here solely to illustrate the lighted LEDs. The map/electrical switch number scan be seen on the panels on the last photo. In addition to the 11 switch panel for the Cheyenne steam yard, there are 3 more in staging, and one at the Granite Quarry and one at Dale Junction.Tortoise turnout controls were used in these locations, because the turnouts are hard or impossible to reach from the aisles.
This is a closer look at Tower A, the interlocking switch building at the west end of the Cheyenne steam yard. Tower operators inside it controlled the turnouts on the four tracks west out of Cheyenne (to the left). The two line sheds on either side of it can be seen on page 106 of the giant Robert Darwin book, "The History of the Union Pacific Railroad in Cheyenne."
Lenny painted and detailed our brass model of Tower A near the east yard limits of Cheyenne. He added many interior details and lights. The line shacks are seen in photos from our 1957 era.
Upper (western 2/3) of Harriman Cutoff with Tracks #1 and #2 against the backdrop. The old Sherman Station is to the left. The signals on the Cutoff show yellow for the through, or right hand track for this portion of the bidirectional double track main, and the lower signal head shows red for the non preferred left had track. These signals are set to match the turnout setting which is manually set by the engineers, who are always proscribed to take the right hand track in either direction, up or down... 
View More
the Hill. The signal bridge over tracks #1 and #2 can be seen against the backdrop at about the photo level of the coal tower. The yellow signal aspect over #2 can just barely be seen. This ABS signal is normally yellow because the signal for the second ABS block ahead is normally red. It is one of our "mother-may-I" signals that are manually turned from red to yellow to give signal permission to enter the Cheyenne yard by the YM there.
Harriman Cutoff (Track #3) viewed from over Dale. The ABS signal for this section of bidirectional track shows yellow for the upper signal head, indicating that the main route down the Hill (the right hand track of the one ABS block of the Cutoff), is clear and available to traffic. The green is not used here; there is a speed restriction for this double track portion of the Cutoff. The lower head shows red, because the turnout is set against it. Actually, the prototype has a siding here, but also it... 
View More
has CTC, so traffic is controlled by a remote CTC operator, but I did not want to have a separate operator devoted to a CTC machine, so we made this part double track. This is an in-camera focus stacked image from a 1 second video of about 30 frames, and I shot it hand held (no tripod). I imagine I moved the camera a bit during the 1 second video exposure, and the camera assembled the multiple images of the stair railing together the best it could to made the composite image with some vertical bars offset.
Scenery and backdrop just to the east of Dale Junction.The near track is the Harriman Cutoff, track #3, approaching the two mains, Tracks #1 and #2.
The Harriman Cutoff, Track #3, is nearly to the turnout of Dale. Westbound trains coming up #3 from the right merge with the left hand track, #2, and continue on down the Hill to Laramie on it, Traffic arriving from Cheyenne from the left is running right handed, and must cross over a crossover from #1 to #2 to run left handed down to Laramie. Trains coming up from Laramie similarly must switch from the left hand track #1 to #2 (middle track here) to return to right handed running on down to Cheyenne. The low poles are power poles to the turnouts and signals. The tall poles are regular public power polls.
A view of Dale Junction from the west (Laramie) side. The 5 head signal on a single mast is for all traffic coming up from Laramie on the left hand track. Left hand three heads: Top: signals the near crossover (possible route to revert to right hand running. Middle head: Signals the second crossover: second route to right hand running down #2. Bottom head: Route not allowed, so signal is always red. Right hand pair of heads: Top head: second turnout of the first crossover. Bottom head: turnover... 
View More
for either route, 1) straight onto #2 right handed down to Cheyenne, or 2) diverted to right onto Harriman, #3, down to Cheyenne or past Cheyenne on Speer Wye to Denver (staging). Far triple head signal: similar for 3 crossovers available for a train from Cheyenne across Dale to Laramie. Double head signal (through water tower legs): Top: Turnout to #2 down, Lower: crossover to #1--NOT allowed, always red.
View of Dale from higher elevation: better view of the3 signal masts and the 3 crossovers plus one turnout to Harriman Cutoff, #3. The coal tower at the upper right corner is at Harriman, Wyoming. The white buildings in the very far upper right are Wycon Chemical that produced fertilizer from the trona (soda) mined in south central Wyoming.
The signal bridge on the east side of Laramie across from the Laramie tie treating plant. The plant is narrow gauge, and stacks of treated ties and poles are visible. Flat cars await loads of treated goods out. The grey building is the 3-retort building, the engine house is the brown building, and behind it are fuel and creosote tanks. The signal bridge has a yellow and a red aspect over the left had track. The left hand running down from Sherman Hill (and up it) ends at the double crossover, which is not prototypical. I bought it several years before starting the layout, and paid $55 for it, and darned if I was going to waste it. Across the aisle is the west side of Cheyenne with a few industries to switch.
The Laramie Tie Treating plant from the west side, and the view up the west slope of Sherman Hill. Tracks1 and #2 are widely separated up this slope; the newer #2 took a longer route down the Laramie range of mountains making it a gentler grade. Hence in 1905 the new #2 on the left became the up grade track, and the old #1 the down. The other main buildings of the Tie Treating Plant are shown in this view, The fire house with glass windowed offices on the second floor, and beyond that the lumber mill... 
View More
and burner with untreated ties and poles yet to be creosoted. The beginning of the Laramie yard can be seen on the next bench to the lllllllleft, and across that aisle can be seen parts of Hanna, a coal mining region. We have modeled 3 of the many mines at the real Hanna.
These are the ABS signals at the west Laramie yard limits. The green is the beginning of another series of ABS blocks. The green indicates that both blocks ahead are unoccupied. The ABS west bound faces the other direction, naturally, and it is one of the normally red "mother-may-I" signals controlled by the Laramie YM to meter the eastbound traffic into his yard from the west. Here we used a two aspect signal, since green is never used too enter these busy and crowded yards at high speed. The next photo shows the signal bridge over both mains at the east Laramie yard limits. These are also normally red "mother-may-I" signals controlled by the Laramie YM.
This is the two aspect yellow over red signal at the west Laramie yard limit. The white yard limit sign is on the fascia. This is another of the "mother-may-I" signals like at all the four main yards (Cheyenne, Laramie, Green River, and Ogden.
Hanna Coal Marshaling Yard and employee houses This also shows the Hanna stock yard for resting stock. Old US Highway 30 crosses over the tracks here, and the white flat-building in the distance is the famous Virginian Hotel, where Owen Wister wrote the first ever full length western novel, "The Virginian." According to Wikipedia, "The novel revolves around the Virginian and the life he lives. As well as describing the Virginian's conflict with his enemy, Trampas, and his romance with the pretty schoolteacher, Molly Stark Wood, Wister weaves a tale of action, violence, hate, revenge, love, and friendship." The 4 axle locomotive is permanently stationed in Hanna, because the curves in the mine region are too sharp for 6 axle power.
The 3 coal mines modeled for Hanna. The Hanna Depot is at the very edge of the photo near the top, and the coal marshaling yard from the previous picture starts at the center right. Mains #1 and #2 curve inside of the coal region to the Sinclair Refinery that is on the east side of Rawlins, Wyoming. Across the far aisle is the Red Desert and the tracks curve around the end cap into Wamsutter, Wyoming, ad of course, everyone one knows where Wamsutter is. Clamped at the top of the backdrop is... 
View More
our two faced fast clock that Bob Ellis provided for use by the passenger train operators. bob is the Passenger Superintendent and he has the 4 City trains, Cities of LA,San Francisco, ST. Louis, and Portland, plus two mixed trains running on a timetable.
This is Wamsutter, Wyoming with its center "Harriman" siding. Here the local switch engine has pulled a tank car off the near end of the train, and backed it down the siding to the right (toward the buildings there), then uncoupled from it and run around it to couple onto the other end of the tank car. His plan was to push the tank car to the end of the spur near the trucks, but he had too go back to the center siding to clear the man for an approaching train on the right hand main. The foreground... 
View More
ABS signals are at the start of blocks on each of the mains. The westbound main (right track) has two heads. The upper head is for the main, and the lower head if for the route to the center siding via the turnout and then the wye turnout. The signal facing the other way is for the east bound track, and a through freight is approaching from the distance. On the top of the next bench is the Cheyenne classification yard above the main staging accessed via the small helix
UP Stock Yard at Bitter Creek, Wyoming, just east of Rock Springs (between Rock Springs and the Main Helix on the lower level). There is also a speeder house at the signals at an ABS block boundary. Lenny 3D printed the speeder house. The woodie is for a California surfer who got really lost smoking those funny cigarettes.
Bitter Creek, Wyoming sheep loading and speeder outside of speeder shack very near ABS block boundary--see ABS signals
UP Coal Company Mine #4 tipple in east Rock Springs, Wyoming, "F" on the green track lower level track plan. The two switchers is one of the pairs of UP switch engines at Rock Springs. These are NW-2's, amd they are on the Rock Springs yard lead.
The ABS signal bridge at the east yard limits of Green River, Wyoming. This is a "mother-may-I" signal which is normally red to stop all trains. Engineers must verbally notify the yardmaster or his helper, the Yard Foreman, to gain admittance into the yard. As soon as the YM is ready, he will press a momentary electrical switch to turn the signal from red to yellow over red, and then the engineer can move his train into the yard on the tracks set by the YM or Yard Foreman. This required stop and small... 
View More
delay assures orderly movements within the yard, so the yard does not get swamped with traffic. The signal stays yellow/red for about 30 seconds, then changes back to the normally red aspect. There are such manually YM operated signals at both ends of Green River, Laramie, and at west Cheyenne and east Ogden. The main staging borders between east Cheyenne and west Ogden.
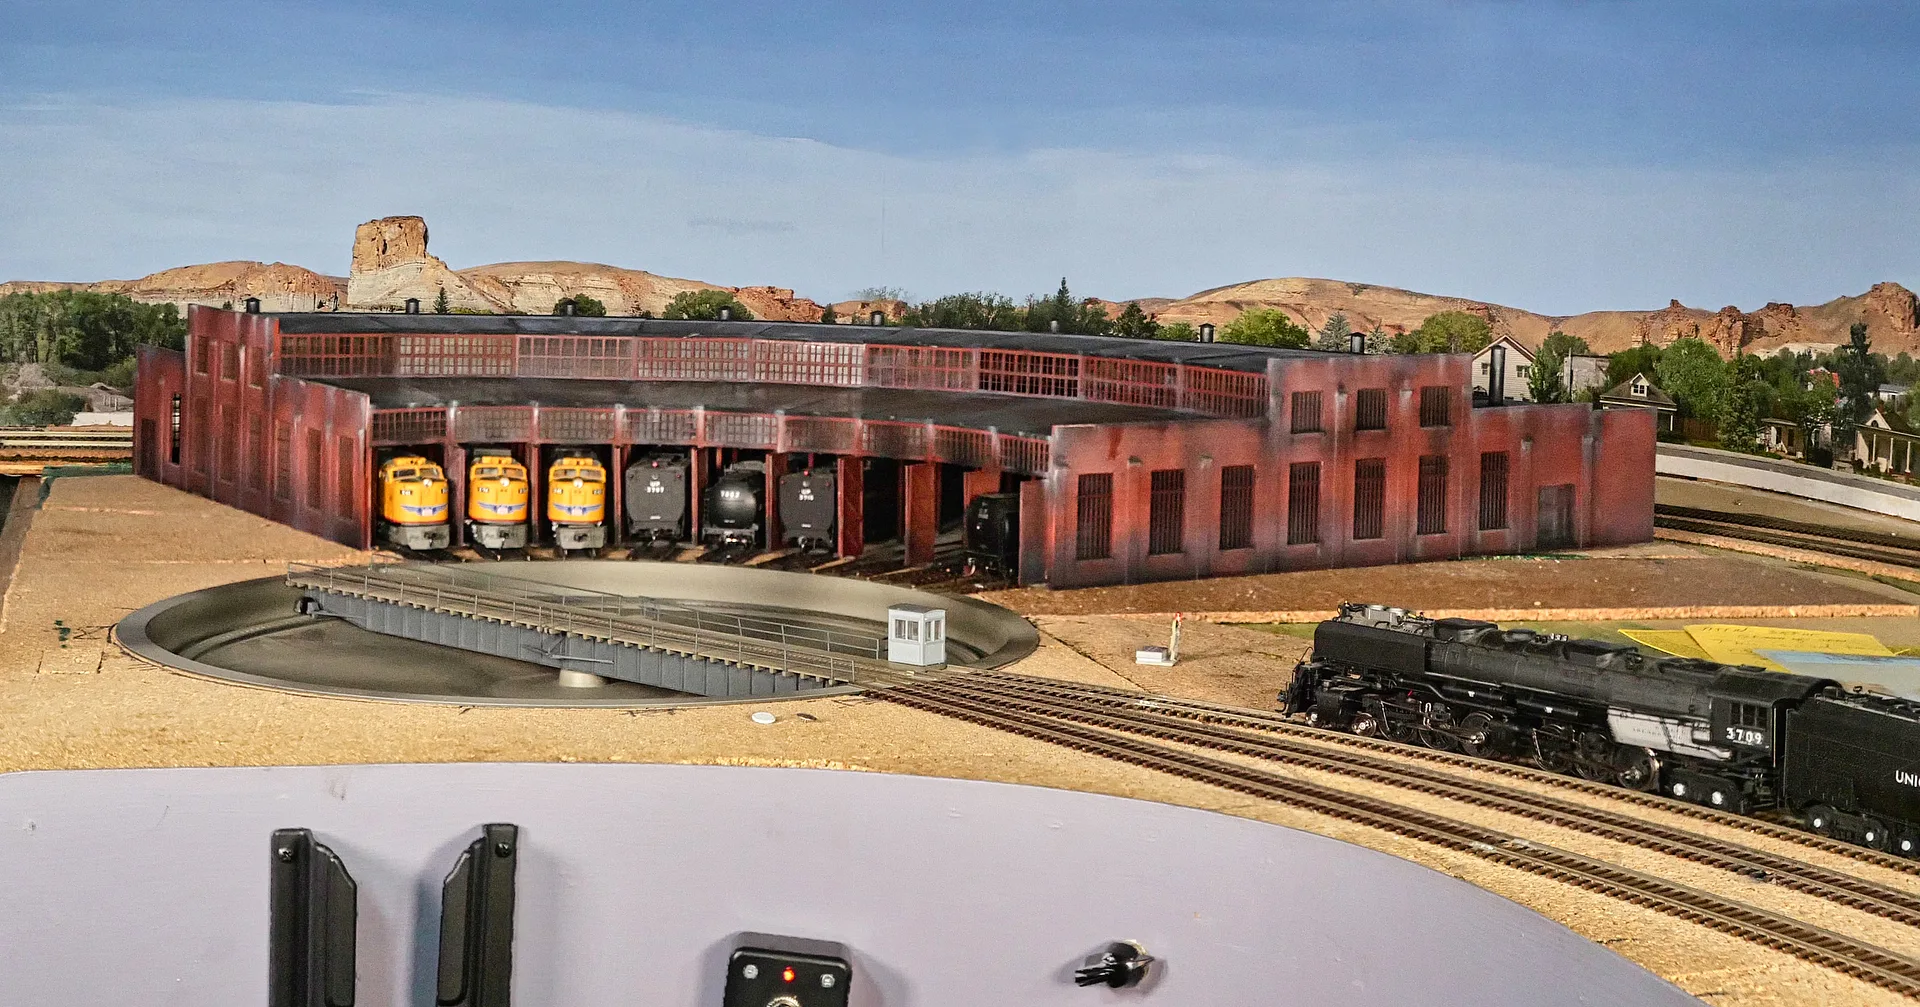
Walthers roundhouse in Green River Wyoming built by Lenny. Three kits joined as designed to be by Walthers.
"Mother-may-I" signal at the west end of Green River. This is a normally red signal which the GR YM controls with a fascia momentary switch. Trains approaching it must stop at the normally red, and notify the GR YM to get permission to enter the yard on a route set by the YM. When the YM is ready for the train, he pressed the switch button to change the aspect to yellow over red, and the train can proceed into Green River at reduced speed. Some of the YM controlled signals do have a green, but they are... 
View More
never used on the "Mother-may-I" signals. The coal hoppers are left by a coal drag train that supplies all the lower level (green track plan) coal towers and other users on that level. The siding is part of the Alco trona (soda) mine complex. There is also a coal drag job on the upper level that supplies hoppers from Hanna to all the upper coal towers and users. Each of the coal drag jobs takes about 3-4 hours to complete, including the time it takes to return the empty hoppers back to the mines.
There is a bit of a dark corner of the layout at Dale. Sharon helped me set up 4 LED lights for some shots. The other LED panel is behind the camera. The cut at the lower right of the picture is for Track #3, the Harriman Cutoff. The yellow electrical switch panel to her left controls the unreachable Tortoise machines at Dale. The panel face is a schematic map of the Junction.
Sunrise over Courthouse Butte and Bell Rock from our front porch in Sedona. To the left of Courthouse is Twin Buttes, and to the right of Bell Rock is Castle Rock.--Christmas Eve, 2020.
Scroll To Top

Audio Mute
Prev
Play
Next
Shuffle
Include
Privacy and cookie policy
This site uses cookies to enhance your browsing experience, serve personalized content, and analyze traffic. By continuing to use this site you agree to use of cookies and stewardship of your data.